- Get link
- X
- Other Apps
It's spring now (on and off) and Graham wanted a zip-free sweatshirt to wear under his Trucker® jacket on our daily walks and bike rides. This seemed like the ideal time to make the sweatshirt from the project list.
It's a very simple make, so this is a review of the final product, which he's very pleased with.
 |
| Graham likes his clothes loose |
The Pattern
Rather than fuss about drafting a new block from instructions and then fitting it, I measured his grey zip-up sweatshirt and plotted a pattern based on that. This is easy to do with mens' tops because they're mostly rectangles. I drafted the sleeve from scratch though because I never can get it right when I try to copy one.
He wanted it a bit looser than his grey zip-up, so I added 5cm at each side seam, and dropped the underarm. This sweatshirt has a 1-piece, dartless raglan sleeve. I wonder if a shoulder dart would give a better fit, but I chose not to use one because I thought it might irritate him. I did have to narrow the sleeve towards the cuff. It was far too wide. Now it's 28cm including seam allowances (1cm each side).
He also wanted the neckline a bit lower at the front; he always wears his zip-up slightly unzipped.
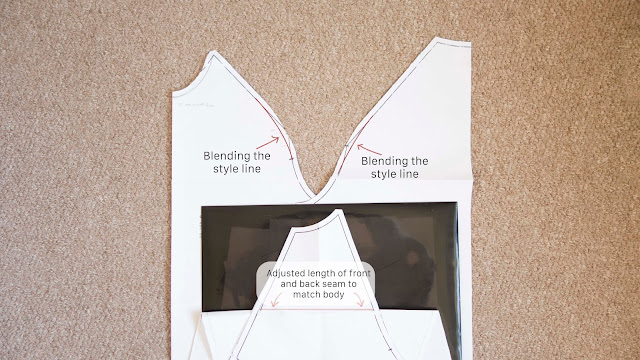
After printing the pattern, I decided the raglan lines were far too pointed, which I believe would cause points on the finished sweater, which isn't ideal. So I blended the lines and adjusted the sleeve pattern to match.
Fabric and Supplies
It's made out of 100% cotton Terry Jersey in 'wine' colour with 100% cotton grey ribbing, both bought from the same supplier on eBay. It cost £26.26 and there's about half left over. The size of the pattern means that I couldn't just use one metre, and you have to buy full metre-lengths.
The ribbing comes in the form of a knitted tube, which is good because you can cut it to the width you want, rather than having it at a standard width. This could be good if you were making a deep waistband or a hat.
 |
| View of the turned back cuff, revealing the inside of the Terry jersey |
 |
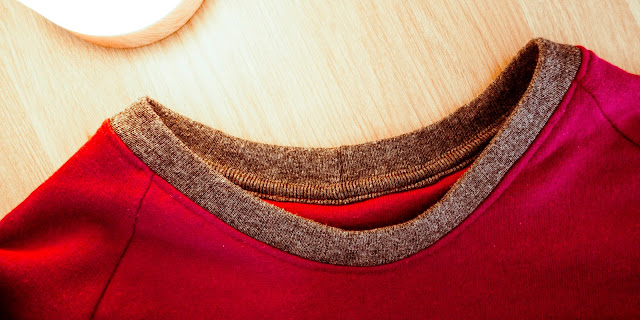
| Close-up of the ribbed grey neckline on the red sweater, with matching grey binding on the inside back neck. |
One essential supply which I already had in is stretch stabiliser. It's used in place of interfacing and makes a lot of difference when it comes to the recoverability of the ribbing. You use it wherever you want stability and stretch. It's like vitamins for stretch fabric. It's worth buying a metre of this to have in. I've had mine for years and will have to get some more soon. I don't remember which one I got, but I think it was something like this.
Overlocker/Serger Threading
I didn't want the black or white thread to show through on the seams, so I used normal sewing thread on the left needle only on my overlocker. I think it looks better, and it means don't have to waste expensive thread on all four spools.
Challenges
This was an easy project. I found it suspicious how well it was going together, sure I'd slip up at some point. But it's only four main seams, plus finishing. The trickiest part was the back neck binding, which I cut slightly too narrow, but it worked. It's not quite as neat as I'd like, but it'll do.
To learn more about sewing t-shirt necklines and cuffs, read this post.
The annoying thing about that was that after looking at my Levi's sweatshirts I realised I didn't actually need to use that. On them the back neck facing is sewn as a facing, not just an extra layer. 🤦🏻♀️
 |
| I stitched the facing down with a 'jersey stitch' as Bernina calls it. It seemed the best way to imitate a coverstitch. |
The Truck Label
Graham is obsessed with cars and such. Obsessed. My sewing machine (Bernina B380) has a truck stitch, so, naturally, everything I make for him has it on. Face coverings, sweatshirts, hats...
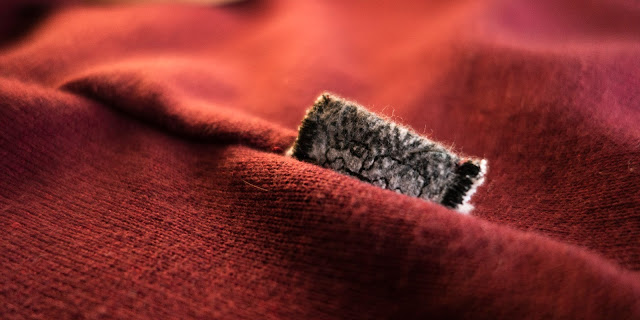
He challenged me: every time I make him something, use the truck stitch but don't tell him where it is. On this I made a little tab for the side seam with it on.
Bonus Beanie
He remarked one bike ride how he envied my earmuffs because his ears were getting cold. He didn't want earmuffs, but he did want warm ears. A beanie hat seemed the best solution, so I made him one to match the sweater.
What I'd Do Differently
Not much. I'd either sew the neck facing as a facing, or make a wider binding. I might also draft a darted raglan sleeve for a different fit, but he likes this one so it's a success. I think it suits him. With the sleeves rolled up he looks like he could be on FRIENDS. XD
PS.
Definitely prewash this fabric. I did with several tea towels and hankies, which are now permanently pink, which I like but it's worth remembering. :)


Comments
Post a Comment