- Get link
- X
- Other Apps
I don't know about you, but for me, buying underwear is a bit like Russian roulette, in that I have no idea what I'm going to get, so I don't play. When I did get shop-bought underwear (which I think was when Mum was still buying it for me), it never fit right. It was always too low in the back, if not all around, too big, or too wide between the legs or what have you. I did have some that fit in a satisfactory way, but that was after a bit of shifting around. And when you tried to lay it flat to put away, it was very clearly designed for an alien with one leg at about 45° to the other. I'm not sure whether that was to save fabric, or just something that jersey does after a lot of washing (it does).
Anyway, not wanting to risk wasting money on pants that don't fit, I decided to try making my own. This started about 3 years ago so I don't have the pictures of the originals anymore. But I do have a timeline of the pants I made and the edits I did. I will worn you now, I kept getting confused and I was new to my overlocker then, so they are NOT neatly sewn, and many have seams on the outside.
 |
| See what I mean about no booty-room? |
Here I tried using a pattern draft from Metric Pattern Cutting for Women's Wear, 5th Ed. That book doesn't have lingerie in it, but it has a sports skirt with built-in panties/shorts. They are HUGE so the ones you see above were taken in a lot. They're still a bit big. Moving on.
 |
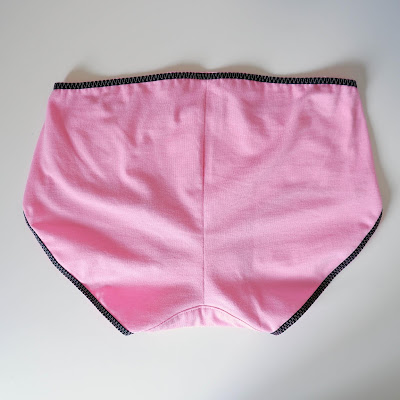
| Note: since starting this blog post, I've made another pair that are better. They're the pink ones in the top picture. |
Fitting Notes
Initially, I just traced a pair of pants I liked the fit of, made it symmetrical, and made some pants from that.
But I'm too curious for that, so I looked at drafting books and the Internet, and tried drafting according to instructions I found. And you know what? It seems I'm an odd shape. I don't have a big bum, but I do have a bum. Most panties seem to come quite low in the back. I added quite a lot to the CB rise. And also took some from the front rise because I don't like them all the way up there.
And then there is the issue of legs and bum. I don't know about you, but my legs spend the majority of their moving life bending forwards about the hips. So it logically follows that the leg holes should be sort of - well, on the front of my panties. Right? The last three pairs look like an exhibit of evolution of pants in this regard. The fronts got smaller and the backs got bigger. Maybe I'm just becoming Bridget Jones now I'm 30.
The Anatomy of Panty Fit
 |
| When you sit down, you don't want too much bunching at the front, and you want full coverage at the back. |
Features of a Well-Drafted Panty Pattern (IMO)
- High back waist so it doesn't feel like they're always falling down
- Lower front waist so they don't feel all bunchy
- Wide gusset, extra wide at the back
- A shaped CB seam. This give you a nice bum shape so that it goes between your cheeks instead of giving you a monobutt. You can see this here: UPDATE: I've made some pants without a shaped back seam now, and I'm fairly convinced it's actually the v-shape a the bottom of the back piece being pointier than the gusset that makes a shaped pair of knickers.
 |
| See the way it sticks up at the cheeks? That's the result of the curved CB seam. It makes a kind of triangular point inwards. (These are the pair I sewed today (29.04.2020) because I got bored.) |
So How Do You Draft A Panty Pattern?
I found the method on Leenas.com and adapted it slightly.
- I shifted the darts to the side seams, and then scaled the waist and hiplines according to the stretch of my fabric (easily done in Adobe Illustrator). I left the gusset at the desired width because it won't stretch in the same way the hips and waist will.
- I curved the CB seam to give a more flattering fit.
- Made the aforementioned fit adjustments.
You will also notice that the waistline and leg holes don't have seam allowances. Elastic is sewn on directly, either with my overlocker, or with a 3-step zigzag stitch on my sewing machine, so that takes care of the raw edge at the same time.
How to Sew Panties
There are 5 seams on my panties. In order of sewing: the CB, the gusset seams (2), and the side seams (2). All at 1 cm seam allowance.
Sewing the gusset
To sew the gusset is a bit like sewing a shirt yoke.- Roll up the front and back pieces with the crotch seam allowances sticking out.
- Have a piece of the gusset RS up in front of you.
- Place the front and back of the panties RS down on their corresponding seams.
- Lay the other gusset piece RS down on top, encasing the front and back pieces.
- Pin and sew.
- Pull right sides out.
- TS along the seams to give a stronger, neater finish.
Now you sew on the elastic
Most sewing patterns will tell you to cut your elastic to a given length and pin and stretch to the fabric and then sew. I don't do that, and I'm fairly sure they don't do it that way in factories either. The floor would be covered in tiny bits of elastic!
The way to do it is to stretch your elastic as you sew, without stretching the fabric. There are 'elastic sewing' presser feet available for this, but I don't have one (there doesn't appear to be a Bernina one anyway). If I want the bit I'm sewing to be smaller, I take take elastic that is about 5 cm from the presser foot, and stretch it so that I have it finger-pinned 6 cm from the presser foot, giving a tension of 20%. You can vary the percentage as you need/want.
For bits I don't want to be smaller than the cut fabric, like anywhere on my panties (they are already cut smaller than me), I keep it taut, but not particularly stretched.
Keep the fabric neat and its raw edges aligned with the side of the elastic as you sew. You also have to help the fabric though under the presser foot with your left hand.
Then the side seams
Sew with a 1 cm seam allowance. I topstitched the side seams down as I did for the gusset seams. This isn't necessary but I think it makes them lay better.
You can trim the seam allowances down if you wish.
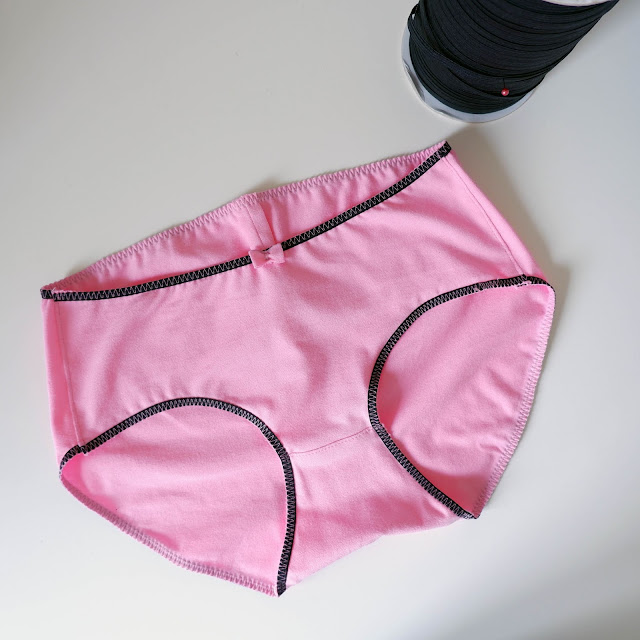
None of my panties are especially pretty, so I added a bow to these, made from a tiny scrap with a zigzag stitch. It's a start. I do want to make some prettier underthings but I think that will take some research.
Do You Need an Overlocker/Serger to Sew Underwear?
No, is the simple answer. I prefer sewing underwear on my sewing machine. That's probably because my overlocker isn't fond of going over varying thicknesses (like elastic or the gusset seam). All you need is a straight stitch and a three-step zigzag stitch. You should use a ballpoint needle though to protect the fabric.


Comments
Post a Comment