- Get link
- X
- Other Apps
Ref.: PRTW008
Title: Lined Plaid/Tartan Skirt
Skills Involved: Pattern-matching; lining; lapped zip (bagged); blind-hem; narrow rolled hem (lining)
Special Equipment Needed: Zipper foot (Bernina #4v); Blind-hem foot (Bernina #5v); Rolled-hem foot (Bernina #63v)
Pattern: Own, based on Simplicity Project Runway 2698 (Out of print)
The Story:

|
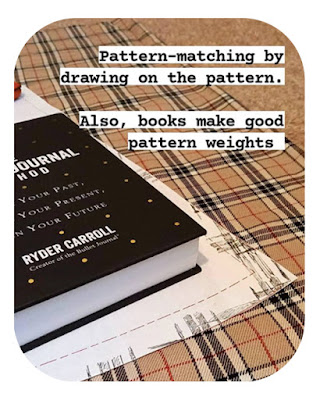
| Books make good pattern weights |
The original was made from Simplicity Project Runway Pattern 2698, which is now out of print, and my copy escaped to the bin years ago. Besides, I've learned to draft patterns since then, so I drafted my own.
The first trip-up was the result of ordering fabric online that looked like the original fabric, but when it arrived was several shades lighter, so with all my light, neutral tops, I'll have to be careful not to look like a bowl of porridge. Regardless, I proceeded to cut.

|
| The new fabric vs. the old |
Overcomplicating things
I don't know about you, but I have a talent for over-complicating things. For some reason I got it into my head that the lining had to be attached at the pockets. Heaven knows why. Fortunately, Christmas came so the skirt had to lie on my ironing board for a few days, and it dawned on me that the lining would go behind the pockets (like it does on every other lined skirt ever). That would be much easier to sew and would mean I wouldn't have a lining-less patch at the hips. Now I just had to cut the hip bits out of the lining and attach them to the front lining pieces.
Moving on.
The Zip
This is one of the main skills to upgrade in this project. I remember when I was first learning to sew that I had a bit of trouble with a lapped zip. The seam allowances didn't seem to allow the application method that was in my Reader's Digest Complete Guide to Sewing. So I turned to the Internet and found Kathleen Fasenella's amazing website, Fashion-Incubator.com. That website changed my whole approach to sewing and is one of the main reasons you and I are here now. It's also one of the main reason I got a first at uni. Thanks, Kathleen!
On that website there are specs and construction methods for lapped, centred, and invisible zips, with no hand-sewing involved, that give a professional finish, because they're the professional methods. That said, it still takes a couple of goes to get good at them.
A montage... (play this tune)

|
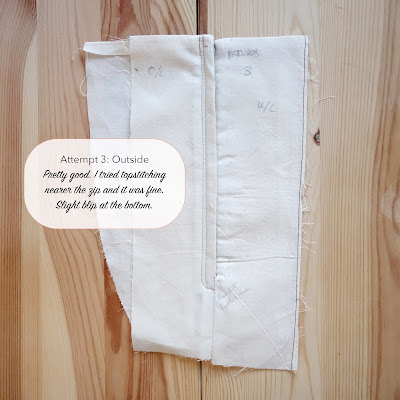
| Much better ☺️ |
 |
| I finger pressed the folds before top-stitching and it made the final result so much better, and easier to achieve. The top-stitching is 1/2" wide (12mm). |
- Front/Overlap side Shell: 2cm
- Front/Overlap side Lining-Facing: 0cm (taper towards main seam allowance from about 3cm above the bottom of the zip).
- Back/Underlap side Shell: 1.2cm
- Back/Underlap side Lining-Facing: 1.2cm

|
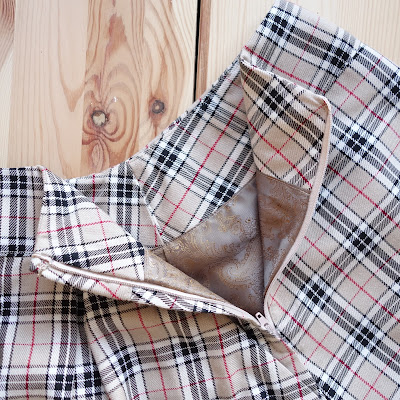
| Not quite perfect, but leaving the bottom 2.5cm (1") or so of lining unattached to the zip makes a better, easier finish. |
VS the zip on the 13-year old-skirt:
 |
| I know the zip should be inside the facing; was trying to follow the instructions in the pattern... |
Most of these were drafting issues.
- The flare angles on the skirt don't match. This is a biggish issue, because it means that it's impossible to get the plaid to match up on the side seams.
- I accidentally sewed the side seam too wide on the side without a zip, which means that the lining didn't quite fit the facing until I adjusted it. Solution: keep notes about atypical seam allowances on hand.
- Cutting out on the carpeted floor of my bedroom does not aid accuracy of pattern-matching.
So Have I Improved?
 |
| 🥰 |
- Get link
- X
- Other Apps
Comments


Your new skirt looks lovely! It was fun reading about how your old skirt lasted for so long! It’s so interesting to see what lasts over time in our wardrobes. I have an old linen top I sewed nearly 10 years ago that I still love to wear.
ReplyDeleteI’ve found that matching the side seam angles on a skirt really helps the side seams hang perpendicular to the floor. This is true for most garments, like trousers, etc, so I’ve been using this principle as a rule of thumb, but I think there are some exceptions as well.
I also cut my fabric on the floor for years, until just a couple years ago. A neighbor was throwing away an old beat-up table, so my relative snagged it and gave it to me! Cutting on a table has made a world of difference. If the opportunity ever comes, I highly recommend it!