I'm still waiting for my fabric to arrive, so I've been making scrubs caps. I'm not the fastest sewer, and the ones I've done are kind of the development ones, so I've only made five so far.
Initially I made them unlined, but the Scrubs group I'm in says they have to be lined. Most scrubs hats in this style are lined on the band, and not the crown, so that's what I've done.
I'd already made 3 single-layer hats, so I lined them by sewing the inner band to the hat along the crown seam; turning it down; turning the straight edge under, and sewing that to the straight edge of the main hat. Pinning was necessary because the orange fabric has some give to it, and the Liberty cotton doesn't.
Making the other hats was easier, I think because the orange fabric hadn't been handled so much.
 |
| The little squares are strap extensions that you can add on. I only cut them off the original pattern so that you could dovetail the band pieces. |
Initially I took a pattern I'd found online but it was hand-drawn and a PDF and I wanted to put it in Adobe Illustrator, where it wouldn't load beyond the first page (which was the crown). I also wanted to make the ponytail style, and this one wasn't. So I traced the crown pattern, added fullness and length (too much, as it turned out), and made a crown bit based on its measurements, to the shape of the patterns you see everywhere.
I'm using 7mm seam allowances, because why waste fabric?
The band part is dovetail-able so that you can just flip it and cut another one. Every other one has a seam at the centre front because the fold will only be on one side as you're cutting.
Making
It's a quick make.
 |
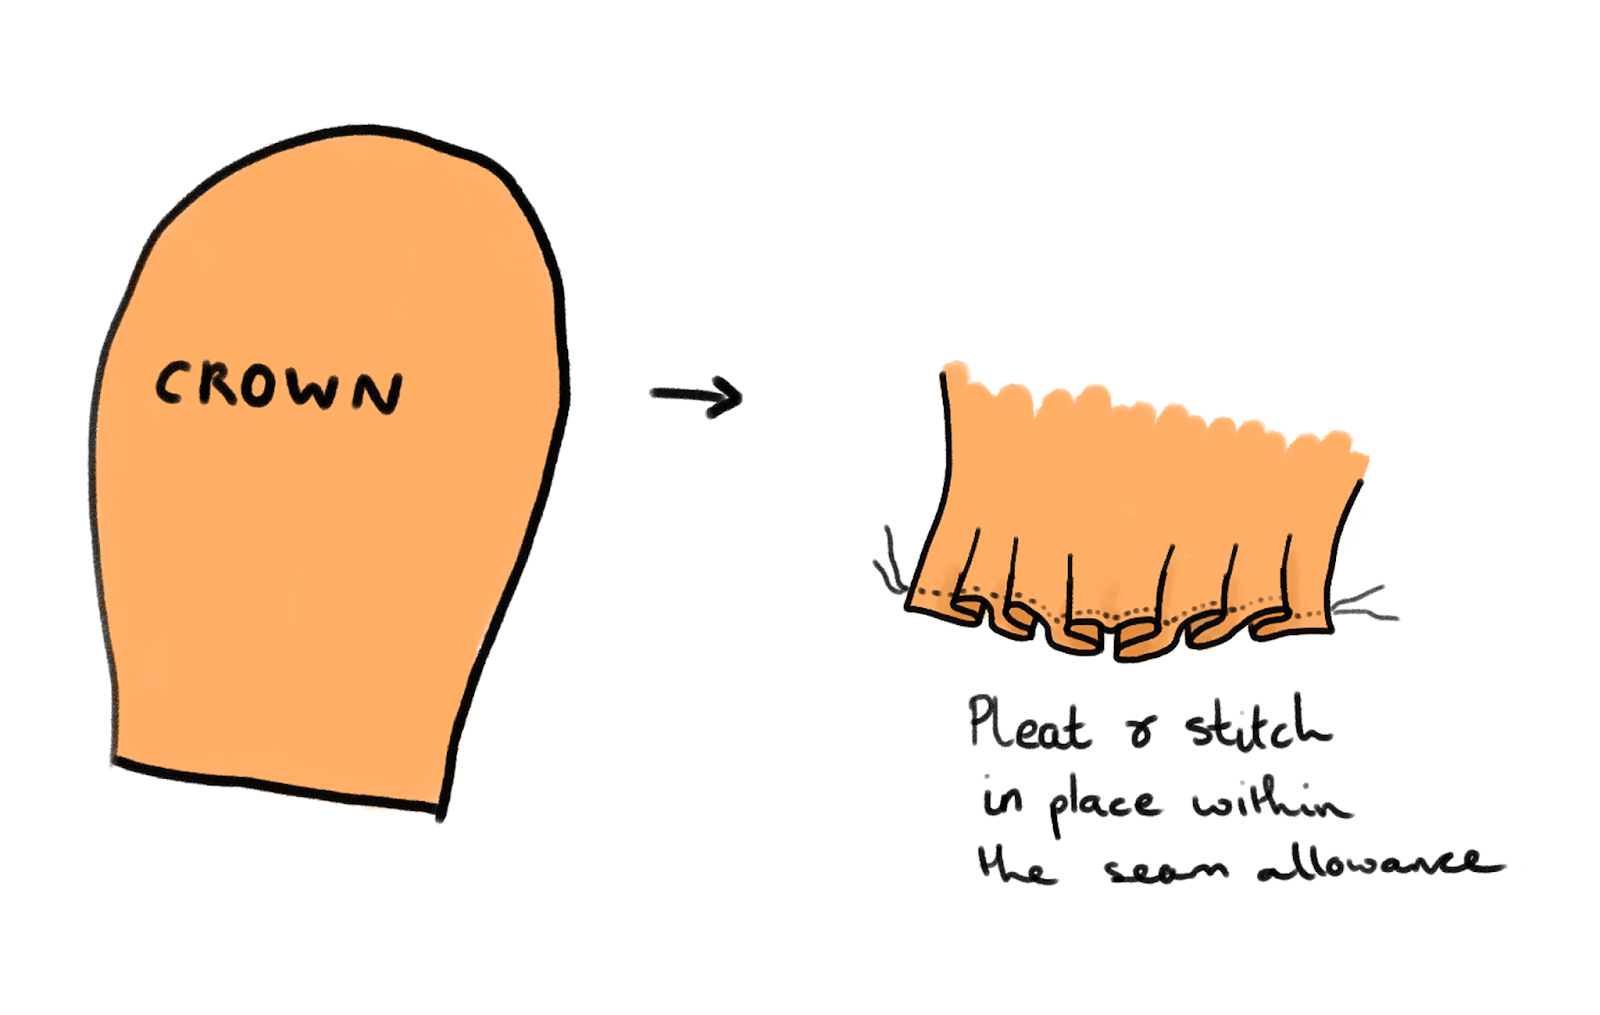
| The pleats allow room for your hairbun. |
 |
Binding the edge. Straight-grain binding is fine; no need for bias.
|
 |
| Start at the CF notches. This makes sure that your crown is sewn symmetrically. You don't need pins to do it this way; just keep the raw edges even and adjust as you go. |
 |
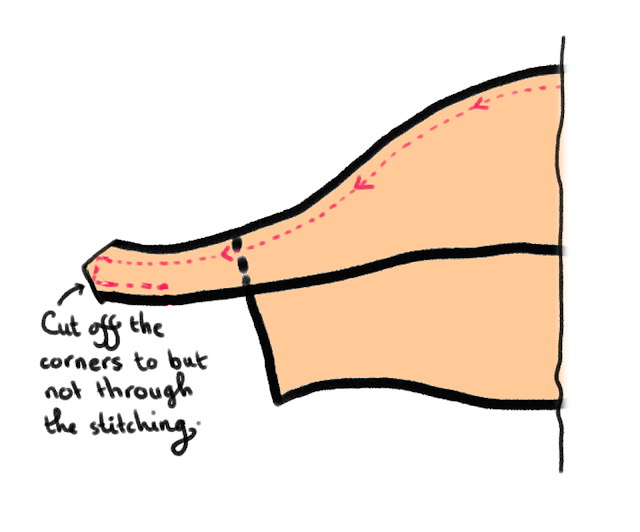
| Turn it RS out. |
 |
| TIP: If one of your fabrics has more give than the other, sew with that one against the feed dogs so that it doesn't stretch out. |
If you were at it solidly you could make at least 5 a day. (Tip: every time you finish one, have a piece of fruit or veg. ;) )
Tips:
- Use your various presser feet! My blind-hem foot was invaluable here for quick and neat top-stitching. The satin-stitch foot for the bar-tacks (you could do those with straight stitches though).
- Overlocking the straight edges makes it easier to do the last step; I think it sort of stay-stitches them and also gives you an edge to fold along.
- If you can move your needle position, that helps too.
 |
This was before I found out they had to be lined.
I feel like if you made one from silk, it'd make a good protective hair bonnet for sleeping in. |


Comments
Post a Comment