- Get link
- X
- Other Apps
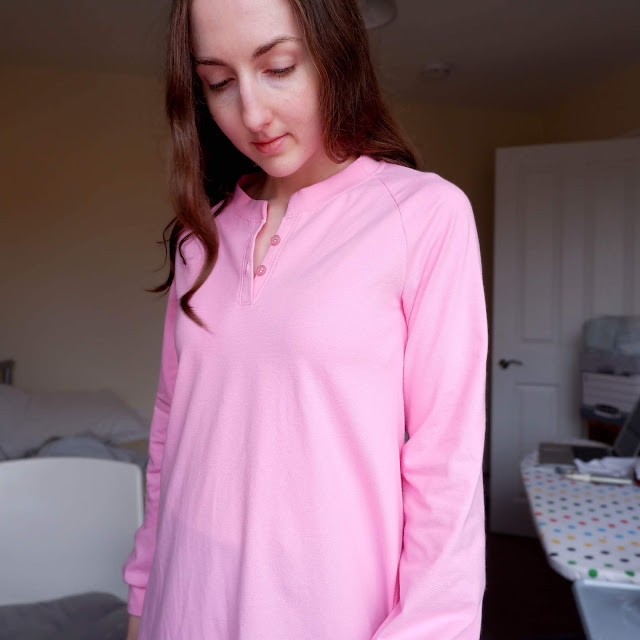
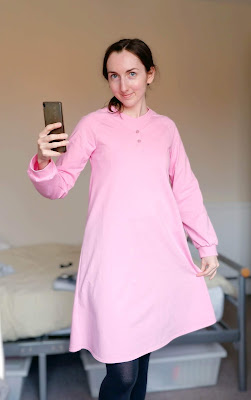
Yesterday I sewed it up. It took me a few hours with taking photos and thinking what to do about the front design. I'm really pleased with how it turned out.
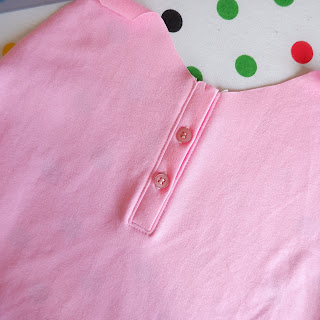
The front design
The fit
Of course, I tried it on immediately. The sleeves are better, I think - less full. The cuffs are definitely better! The neckline is warmer, which is important because I wanted a cosy nightie. BUT! I think I made a maths error when I was cutting the ribbing and it's twice as wide as I wanted! I only noticed after sewing it on, and I was NOT going to unpick it. It looks okay, and it's not too small, so I'm okay with it. It's just something to note if I make another one.
The shoulders look a little tight in the photos. I was pondering how to fix that, and then it dawned on me to just curve out the raglan seams a bit. Just a little, to allow the extra fabric. Just at the front.
The ribbing is a mite small since I added the placket (which meant about 12mm removed from the collar's length). It's okay, but it wibbled a tiny bit at the back.
The flare is nice, and the length. I think I'd make a longer one for a cold winter, and if I were doing that, I'd like to make it in a thicker jersey.
I've made notes of these things on the pattern so that future me will know what to expect, and what the verdicts were.
The thing that changed it all
Stabiliser. Or interfacing. I can't remember which I bought because it was ages ago. I think it was stabiliser because I was doing embroidery on jersey at uni. Anyway, most importantly, it's stretch stabiliser, which means that you can still do this:
 |
| (I learned how to make a gif!) |
...without getting wibbly-wobbly fabric!
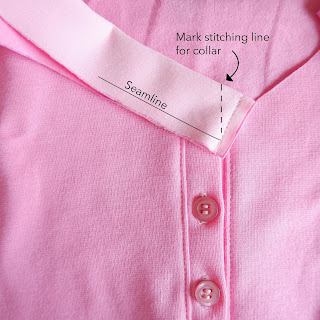
I put it on the neckline ribbing/collar, the cuffs (in the gif), the neckline for the placket, and the placket itself. It makes your work much neater and helps avoid the homemade look (the bad kind).
I think it's worth getting quality interfacing and stabiliser.
Techniques used
- Placket á la Polo shirt
- Ribbed neckline
- Back neck binding (if you have a manual buttonhole foot like Bernina's #3 that helps a lot! I think a cording foot from other makes would do.)
- Cuffs
- Gathers (on sleeves at cuffs)
- Twin-needle hem (oh! how I'd like a coverstitch machine!) I need to get some new twin-needles.
- Overlocking/serging. I love my overlocker. It's definitely worth having!
Review of make
Once I'd got the neckline down, this was a really easy, quick make. I can see a lot of potential for this pattern. It can be t-shirts or dresses. You can vary the neckline endlessly. Pockets. Add a front opening. Make in a bigger size for a jacket/hoodie thing, maybe a dressing gown/robe. I'm working on grading it so I can upload it to BurdaStyle. UPDATE: BurdaStyle is no longer allowing member pattern uploads.
Changes I'd make
Well, apart from lowering the armscye again...
- I've now done a slight full bust adjustment on the pattern as this is a touch snug (never thought I'd have to do one of those!)
- Add pockets! It might seem a bit silly on a nightie, but it's be a good place to keep a hankie, and any other little things I might have to carry about if I'm ill or on the way to the bathroom on holiday. Besides, pockets on all women's clothes are a political statement of feminism. Right?
What next?
Well, a surprise for my manager's 30th birthday, which won't get blogged about until her birthday in May, but will get instagrammed about (I've temporarily blocked her so it won't ruin the surprise.
I am grading the nightie pattern to put on Burdastyle so anyone can have a go if they want to. I'll do a tutorial or two on the trickier bits, and do simple instructions for the rest of it.
And I'll pick something else from the list. Either another t-shirt (this time for Graham) or a hoodie (for Hobbit). I think a hoodie would be a good choice, since I've got the hang of t-shirts now.
Comments
Post a Comment